Create a migration
Migrations keep track of changes to the database structure over time. They make it possible to undo (roll back) a set of changes, or create a second database with the same structure as the first. With migrations, you have a full history of modifications like adding or removing columns (and entire tables).
In the previous chapter, you added an Items set to the context. Since the context now includes a set (or table) that doesn't exist in the database, you need to create a migration to update the database:
dotnet ef migrations add AddItems
This creates a new migration called AddItems by examining any changes you've made to the context.
If you get an error like
No executable found matching command "dotnet-ef", make sure you're in the right directory. These commands must be run from the project root directory (where theProgram.csfile is).
If you open up the Data/Migrations directory, you'll see a few files:
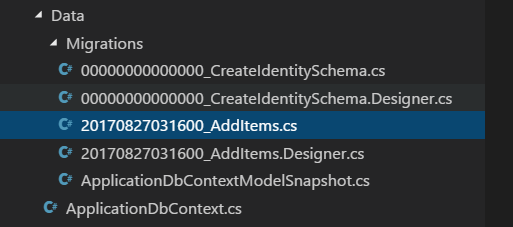
The first migration file (with a name like 00_CreateIdentitySchema.cs) was created and applied for you way back when you ran dotnet new. Your new AddItem migration is prefixed with a timestamp when you create it.
You can see a list of migrations with
dotnet ef migrations list.
If you open your migration file, you'll see two methods called Up and Down:
Data/Migrations/
protected override void Up(MigrationBuilder migrationBuilder)
{
    // (... some code)

    migrationBuilder.CreateTable(
        name: "Items",
        columns: table => new
        {
            Id = table.Column<Guid>(nullable: false),
            DueAt = table.Column<DateTimeOffset>(nullable: true),
            IsDone = table.Column<bool>(nullable: false),
            Title = table.Column<string>(nullable: true)
        },
        constraints: table =>
        {
            table.PrimaryKey("PK_Items", x => x.Id);
        });

    // (some code...)
}

protected override void Down(MigrationBuilder migrationBuilder)
{
    // (... some code)

    migrationBuilder.DropTable(
        name: "Items");

    // (some code...)
}
The Up method runs when you apply the migration to the database. Since you added a DbSet<TodoItem> to the database context, Entity Framework Core will create an Items table (with columns that match a TodoItem) when you apply the migration.
The Down method does the opposite: if you need to undo (roll back) the migration, the Items table will be dropped.
Workaround for SQLite limitations
There are some limitations of SQLite that get in the way if you try to run the migration as-is. Until this problem is fixed, use this workaround:
- Comment out or remove the
migrationBuilder.AddForeignKeylines in theUpmethod. - Comment out or remove any
migrationBuilder.DropForeignKeylines in theDownmethod.
If you use a full-fledged SQL database, like SQL Server or MySQL, this won't be an issue and you won't need to do this (admittedly hackish) workaround.
Apply the migration
The final step after creating one (or more) migrations is to actually apply them to the database:
dotnet ef database update
This command will cause Entity Framework Core to create the Items table in the database.
If you want to roll back the database, you can provide the name of the previous migration:
dotnet ef database update CreateIdentitySchemaThis will run theDownmethods of any migrations newer than the migration you specify.If you need to completely erase the database and start over, run
dotnet ef database dropfollowed bydotnet ef database updateto re-scaffold the database and bring it up to the current migration.
That's it! Both the database and the context are ready to go. Next, you'll use the context in your service layer.